Background
-
The purpose of this guide is to help walk you through the process of configuring Sendbird’s Dashboard Single Sign On (SSO) with the SSO Provider, Azure AD.
Getting Started
-
Obtain the Organization Key from the Sendbird Dashboard
-
Create an enterprise application in Azure AD
-
As an Azure Admin, navigate to Azure Active Directory, select Enterprise applications and finally click new application:
-
Create your own application
-
Set the app name as “Sendbird” and select the option to integrate any other application you don’t find in the gallery.
-
Once your application has been created, select Single sign-on from the left menu, and select SAML.
-
Next we’ll configure Azure for SAML. Select Edit on the Section 1 card:
-
Fill in the following fields:
- Identifier (Entity ID): https://sendbird.com
- Reply URL (Assertion Consumer Service URL): https://gate.sendbird.com/sso/<Organization Key>/acs
-
Select Edit on the Section 2 card:
-
Click the Unique User Identifier (Name ID) claim to edit it. Edit it to match the following:
-
Remove all of the additional claims by clicking the … and selecting delete. Our User Attributes and Claims should look like:
-
Return to the SAML Single Sign-On page and select Edit on section 3 card.
-
Set the Signing Option to Sign SAML response and assertion
-
Once the Signing Option has been updated, download the Base64 certificate from the section 3 card.
-
Finally, make note of the Login URL and the Azure AD Identifier from the section 4 card. You will need these for the Sendbird Dashboard in the next step
-
-
Configure SSO in the Sendbird Dashboard
-
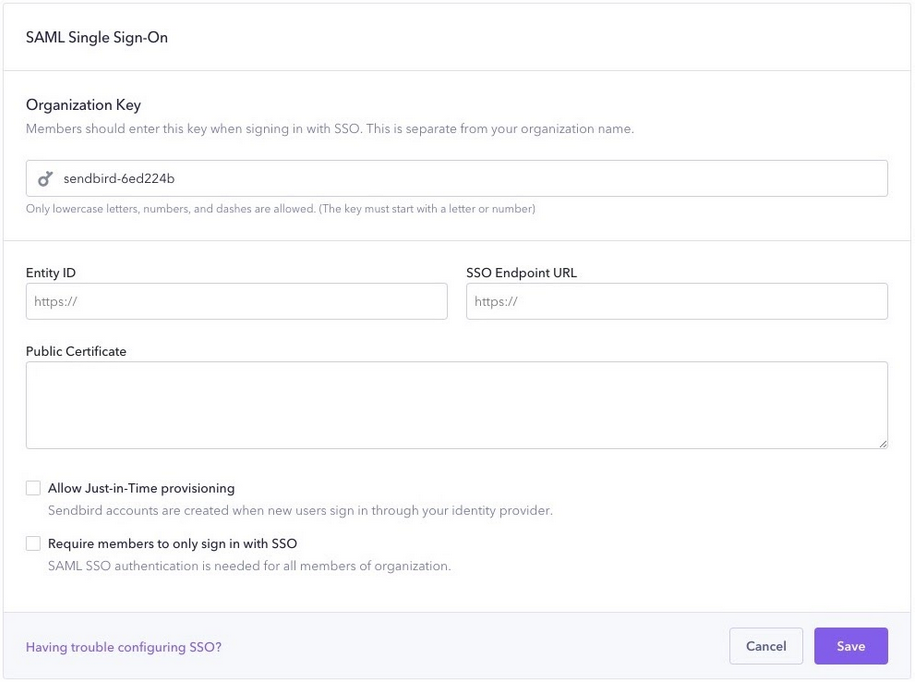
In your Sendbird Dashboard → Access Control → , under SAML Single Sign-On (Where we obtained the Organization Key), fill in the following items using the Setup Instructions from Azure
- Sendbird Entity ID: Azure AD Identifier
- Sendbird SSO Endpoint URL: Azure Login URL
- Sendbird Public Certificate: Contents of the Sendbird.cer downloaded from the section 3 card in Azure.
Note: Enable “Allow Just-inTime provisioning” to allow automatic account creation when signing in from Azure. If this is not enabled, users will need to have an existing account in Sendbird to sign in.
-
Save, and you’re all set. SSO has been configured to work between Azure and the Sendbird Dashboard.
-